Once upon a time, I gardened, I mean REALLY gardened. Flowers were my thing. Our first home was a townhouse and I spent the better part of a year transforming our postage stamp backyard into an oasis with pea gravel paths and carefully planned beds where texture, color and size were all carefully deliberated and coordinated. I even scoured catalogs to mail order plants that were not readily found at my local nursery. Just swish that sort of free time around in your temporal lobe for a second and savor it.
Then we moved to our current three acre homestead when I was 99.89% ready to pop with my firstborn. Not only was the vastness of the space overwhelming, it looked like a prairie. I’m talking swaying hip-high grasses that could have hidden a cheetah for all I knew. Let’s just say it was about a half a second from being foreclosed upon and the owners had bigger woes to worry about than curb appeal. We had to get a farmer to bale it. Yes, my yard was freaking harvested. It was enough to make a pregnant woman weep, or at the very least, give up.
Seventeen years later, I still don’t have a proper garden because . . . life. With tasks like finding a very specific red shin guard sleeve crowding my to-do list, it doesn’t leave oodles of time to hunt down the perfect blush pink iris. But my landscaping looks kinda good-ish, at least around the pool, and I still cultivate a beauty or two. My hydrangeas kicked butt and provoked envy this year.
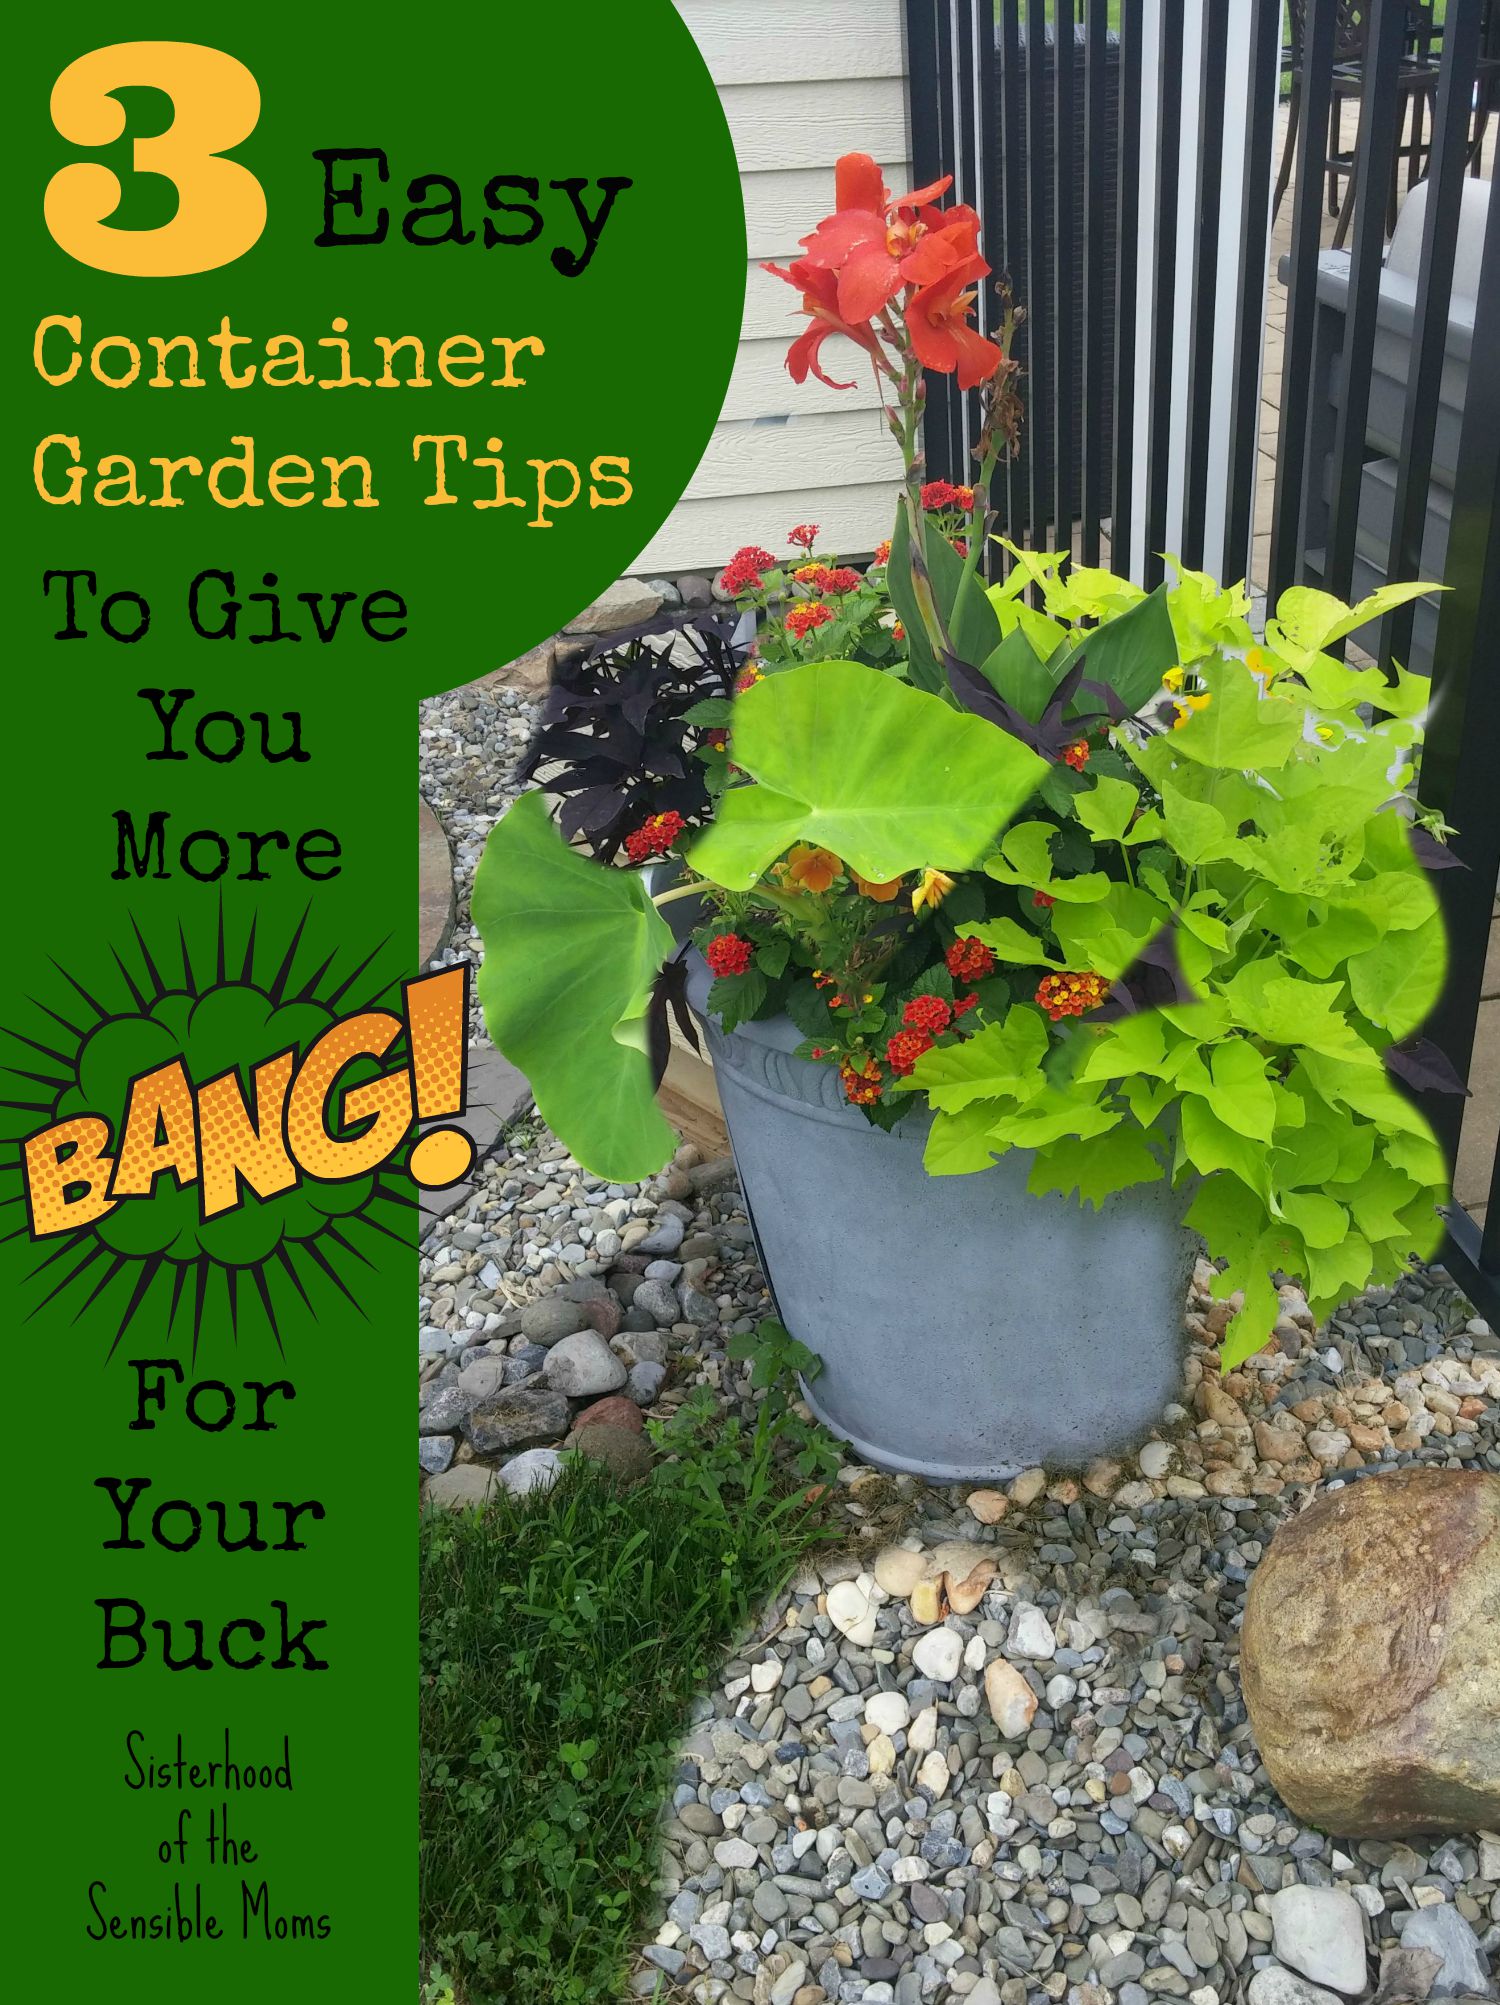
Basically, a lot of my much divided attention nowadays drifts toward two things: hardscape and containers. First hardscape because, oh my goodness, when it’s done, you’re done. I am a fan of permanent wow factors. Second, container gardening is dear to my heart because, well, it is so contained. A little plot of a garden would look lost in my yard, but a well-planted and well-situated container gives a pop of interest. When you combine hardscape with beautiful planters, well my friend, you have achieved the sweet spot for lazy easy gardening.
Here are three quick tips to make the most out of your containers.
1. Drainage
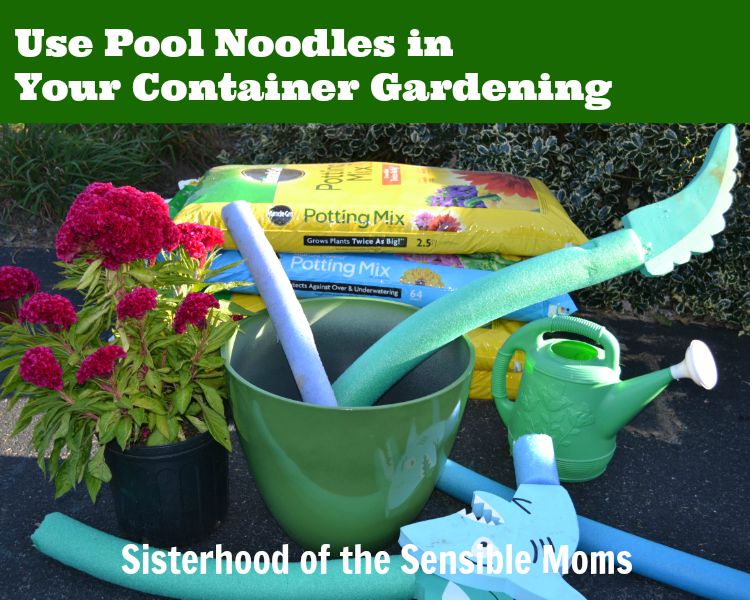
The major drawback to container gardening is the watering. They pretty much need a daily dousing to survive, but over-watering is a deadly sin too. They’re kind of like the Goldilocks of gardens. The key to keeping them “just right” is proper drainage. The easiest solution is a pot with a drainage hole, but sometimes your container is in a location where muddy water seeping out of the bottom would not be ideal, like next to a pool. If you have a solid pot, you need something in the bottom to provide a space for drainage. Gravel is the standard material, but it is heavy to haul and if your pot has any size to it, adding gravel makes it almost impossible to move.
I hit upon using my old, busted pool noodles in the bottom for drainage. Even if you don’t have old ones to use, you can find them cheaply at the dollar store or buy them from Amazon here. See the full step-by-step here.
2. Fertilizing
Okay, this might seem like a big fat “Duh!” but you have to remember I’m really kind of a lazy gardener. So my pots stay out all winter . . . maybe even with the dead plants still in them. Did I mention I hate winter? Anyway, in one of my pots a ton of soil washed out so I tossed in some of the Miracle-Gro potting mix I still had from the pool noodle potting project. Let me be clear, the other poor little pot got none.
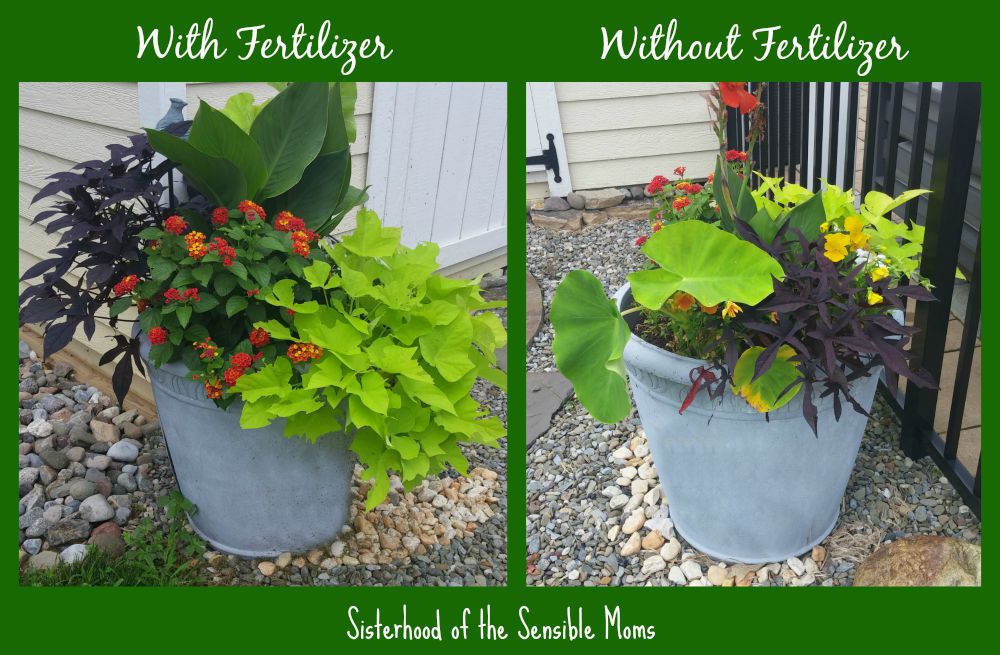
The results were so remarkable that even others noticed. “What happened with those puny flowers?” Favoritism. Favoritism is what happened. So if you’ve ever wondered if fertilizing matters, it does. And no worries, I added some Miracle-Gro to the pitiful one because playing favorites is not my thing. Remember, laziness is my thing.
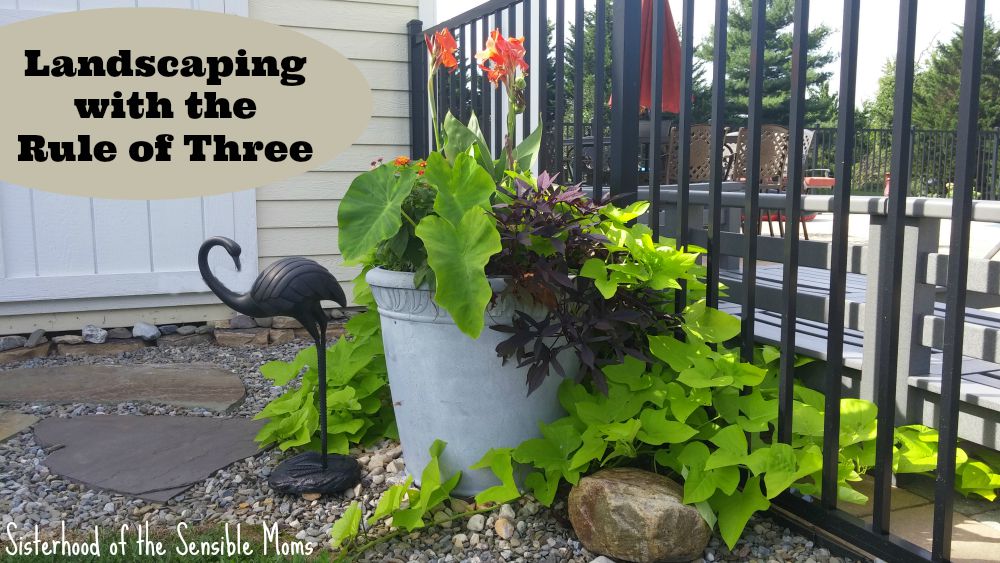
3. Give Some Pop With Rocks
This is where hardscape meets container gardening to help achieve the design rule of three. What? I had electives in art history and architecture in college. Basically, odd-numbered pairings provide more harmony and force movement of the eye to create visual interest. Why do three objects create this feeling while four does not? I don’t know, I didn’t take that many classes, I was a microbiology major for goodness’ sake, but I do know the feeling of balance is real.
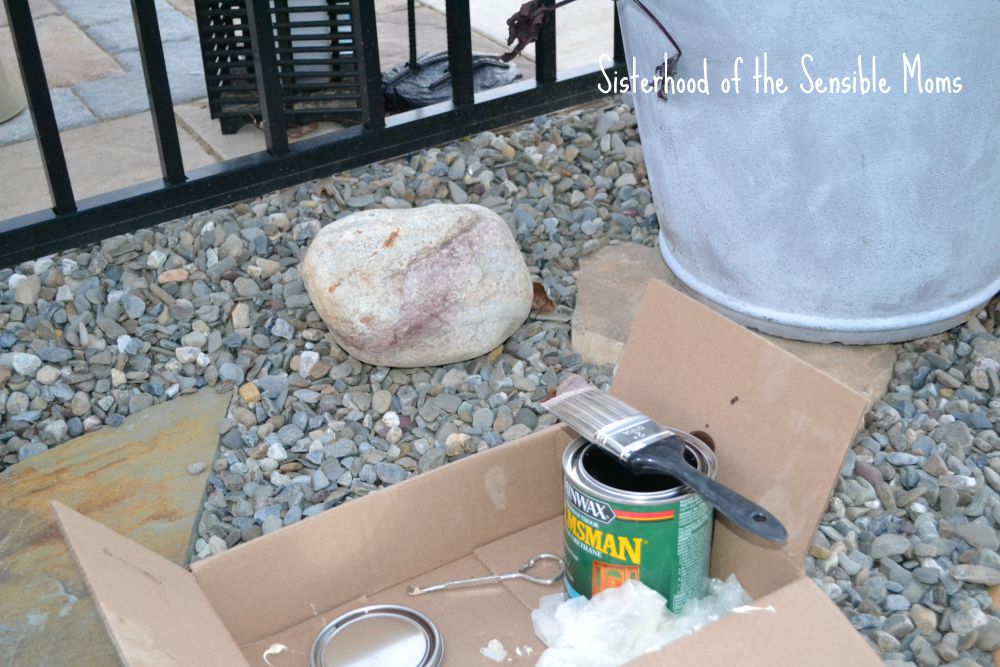
So where one big planter plopped down by the fence is pretty, a pot balanced with two other objects is much more interesting. I used larger rocks to add this interest and then took it one step farther to make it even MORE interesting.
You know how wet rocks have a depth of color to them that just isn’t there when they’re dry? I created a permanently “wet” appearance simply by brushing them with glossy outdoor polyurethane.
So this:
Became this:
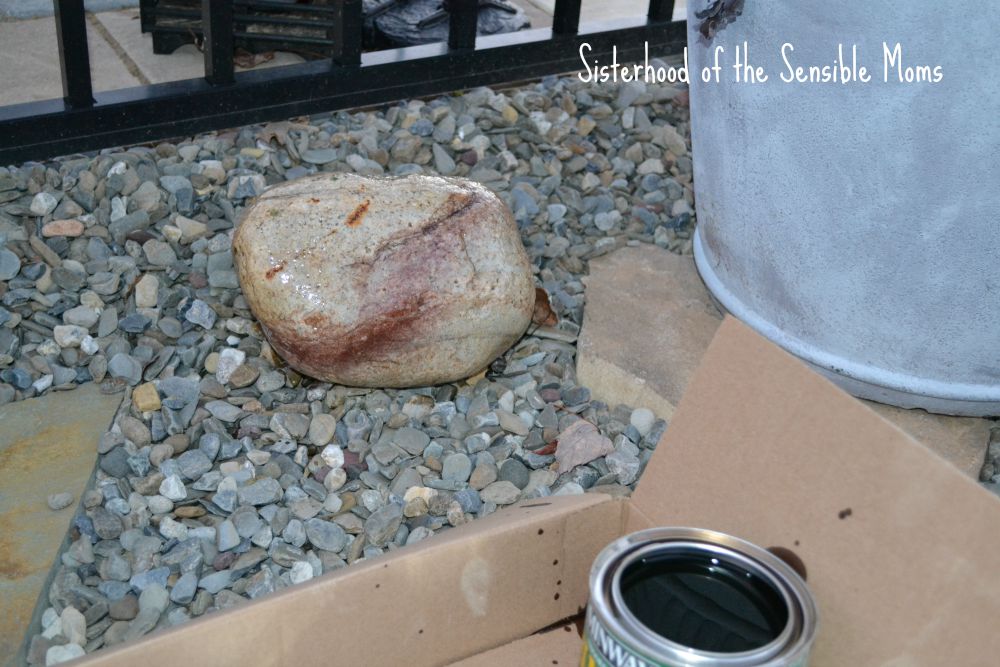
See how that gorgeous red vein of color pops out? And I just brushed the poly on the rocks right where they lay. This isn’t really a project that requires perfection. I did make sure the forecast was clear for at least 24 hours so that they had time to dry. Know also that the can of polyurethane will be ruined for other projects because no matter much you scrub the rocks, dirt still ends up in the can. Use a brush you can throw away, too. While I’m usually a fan of foam brushes, I found that one with bristles worked better for this project to get into the nooks and crannies and to get under the edges of the rocks.
Here is one more: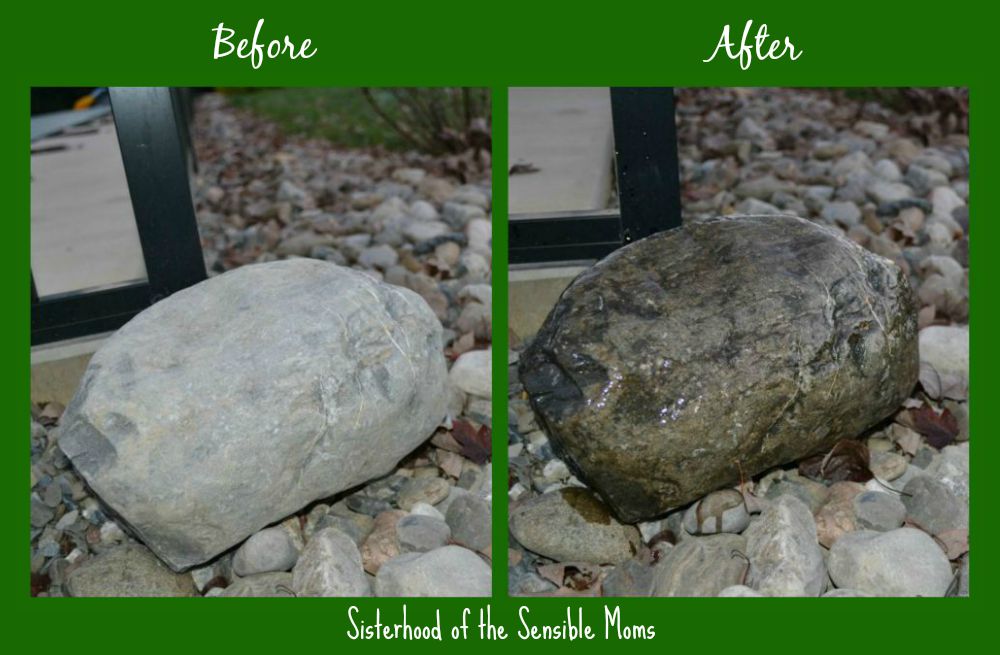
The finish has held up for well over a year now. Here’s one featured in the Rule of Three.
By the way, this is the puny pot about five weeks after I added Miracle-Gro.
Now go forth to drain, fertilize, and pop! Bet you never got a directive like that before.
-Ellen
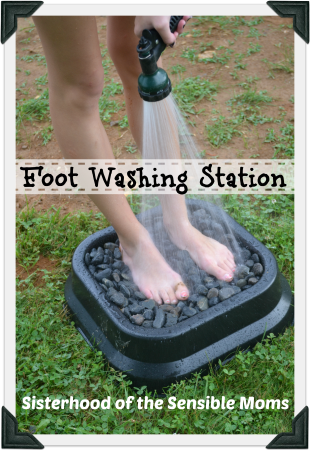
Can’t get enough of projects with rocks? See how to make this foot washing station here.

You can follow us on Google+, Twitter, Facebook, Instagram, and Pinterest.
Check out our books, “I Just Want to Be Alone” and “You Have Lipstick on Your Teeth.”